
Parking Lot Striping DIY
DIY (do it yourself) describes a group of folks out there that love repairing or building things themselves. There are many reasons why someone becomes a DIY guy or gal. Sometimes it’s just saving money or maybe it's the love of getting your hands dirty. Other times people just having to know how things work. Regardless of your reasons we think that’s great, so we thought we would throw you a little support for your DIY parking lot striping project with these simple tips.
About the Prep Work
When it comes to prep work it's not rocket science. Whatever surface your painting just needs to be clean. For asphalt and concrete parking lots that means you need to sweep and blow, then pressure wash off the area. Start by sweeping and blowing off the heavy dirt. Then pressure wash off the lighter dust. It doesn’t have to be absolutely perfect, just be sure there is no standing dirt on the asphalt when you're done. This will prevent paint from flaking and peeling later.
About the Layout
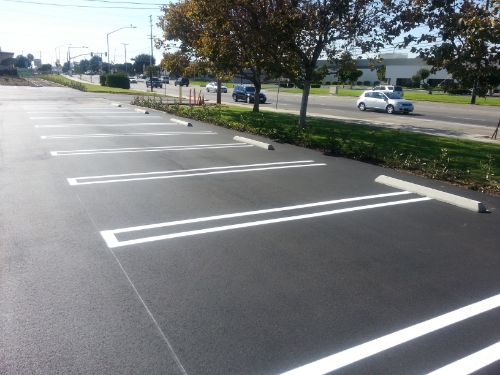
If you are re-painting old parking lot lines, just use a carpenters chalk line and snap along the edge of the existing lines as well as along the foot of the stalls for a starting point. Nervous about starting the line? Just drop a piece of card board down at the beginning of each line as you paint. If you need to layout some new stalls, just keep them between 8'6" and 9' in width. The length of the stalls should be at least 16'. Handicap stalls are different though, they need to be 9' wide and 18' deep, with a 8' cross hatch on the right hand side of the stall. Check with your city first about parking lot striping codes (link is for Southern California codes only) in your area for exact measurements, and remember that ADA markings are a federal and local requirement, not to mention a major source of frivolous litigation.
Are you Mechanically Inclined?
Parking lot striping is typically done using a commercial grade line spraying machine like these here. Starting at about 3000 dollars for the low end machines, buying one of these is probably not recommended. However, you can ask around at your local rental shops, as many of them carry line striping machines that you can rent for about 100 dollars a day. Not mechanically inclined? Grab yourself some upside down aerosol paint like these here. With these paints and some painters tape, it's pretty easy to repaint or paint new lines. Just mark out your lines and then use the tape to tape out the lines at a width of about 4". The better you get the tape to stick to the asphalt or concrete the less chance for fuzzy lines.
Let it dry
One of the last things you will want to do is to give your freshly painted parking lot lines a chance to really setup. They will be dry to the touch within hours of painting, however for the paint to last you should try to give it 24 hours before allowing vehicle traffic on to the lines Barricade the areas with some cones or delineators and be sure to string off the area using flagging tape. If someone slips in that wet paint it can be very expensive.
So the Basic Steps are as Follows:
- Clean area
- Layout striping lines & handicaps
- Paint lines by spray paint or rented machine
- Follow local & federal codes regarding layout and the ADA
- Let barricaded paint dry for 24 hours
- Clean up your mess and you're done!
Changed Your Mind?


Comments